Before anything else, I imported my first model on my animation workspace. I encountered an error upon doing this. There was a message prompt stating to locate the folder name or the files of the texture that I used. When I imported it, it was barenaked as shown in figure 1. So I locate the folder name from the windows prompted when I encountered an error. After that, bare in mind that the folder should be in the first of the list, it means that it will be the first one the the 3D max will see.
 |
| Figure 1. The model doesn't have any texture |
After retrieving the file, I added the texture back to my models as shown in Figure 2. Take note that you should just click the Show icon and not the add to shape from the material editor because it is just hidden.
 |
| Figure 2. Adding the texture to the model |
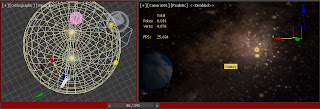
I started my animation by setting the time configuration which is 24fps. It does mean that every 24 frames it will be 1 second. The next thing I did was to build my surroundings. I used the technique of the sky dome. When I added the image, I was so happy because using a Milky way images is indeed look nice. The Milky way image has a bright part in the middle. I added two free lights on it as shown in Figure 3.
 | |
| Figure 3. Added two free lights with galaxy dome |
It doesn't look that bright so I added more lights on it to enhance the middle part of the Milky way image as shown in Figure 4. In addition to that, I added earth on the scene.
 |
| Figure 4. Added more lights and earth |
The real animation begins, the setting of keys. I wanted the spaceship to fly from the left side near the camera to the right then rotate to the left while it fly away from the camera. At first I thought of using the path, but I felt like it will be harder. So I decided to just set the key and do the rotation manually until I got what I needed scene (Figure 5).
 |
| Figure 5. Spaceship turns |
I found something that will help me with my animation which is the Trajectory (UM3DLab, 2011). It looks like a path because you can see how your model goes. I use this technique to see how hard my model rotates because I wanted to get a good rotation effect for my model.
 |
| Figure 6. Tajectory |
I find it to dark for my spacetank model so I added a target light on it. I also want to highlight that model to show that there's something from far.
 |
| Figure 7. Added target light for my spacetank model |
References:
Talent, David. Wide angle view of our own Galaxy. [online] Available at: <http://www.noao.edu/image_gallery/html/im0301.html> [Accessed 3 December 2012 ].
bbbeto, 2011. Planet Texture 3. [online] Available at: <http://bbbeto.deviantart.com/art/Planet-Texture-3-201242847> [Accessed 3 December 2012 ].
UM3DLab, 2011. [MAX] 06 - Animation 101 - Keyframes and Time Configuration. [video online] Available at: <http://www.youtube.com/watch?v=VfVsPWp4Fyg&feature=related> [Accessed 3 December 2012 ].
No comments:
Post a Comment