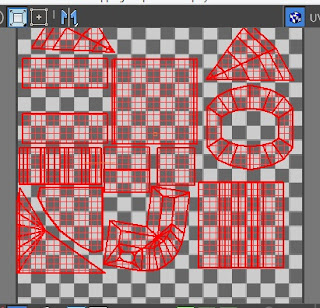
This tutorial is all about the UVW wrapping texture technique. You can find the Unwrap UVW in Modifier List. Figure 1 shows the Edit UVW's window where you can detach the polygons/faces (not totally detaching it from the model but it is like making a copy of the polygons/faces you have selected) to add texture.
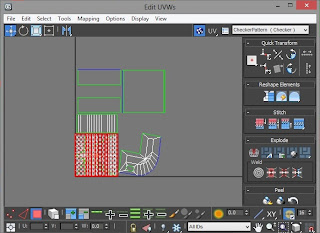 |
| Figure 1. Edit UVW's window |
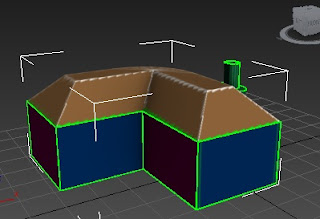
Selecting the polygons/faces is easy compare to in choosing the right projection (Figure 3). According to the tutorial, we should try the different projection such as the Planar Map, Cylindrical Map, Spherical Map, Box Map and even the XYZ alignment options. So I followed him and tried it to get a proper shape. Unfortunately, some of my selections are not showing a good shape even if I play with the different options.
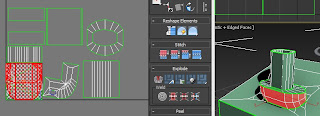 |
| Figure 2. Cannot find the right form/shape |
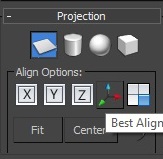 |
| Figure 3. Projection |
So, I thought of making some parts of it. Such as from the selection in Figure 3 (red coloured polygons; right image), I divided the it into 3 (left, middle and right) selections. As shown in Figure 4, the pie look on the upper-left hand side image is the
left selection, the box with white line in the middle is the
middle selection while the red lines is the
right selection. With this technique, I was able to lay them all the polygons properly.
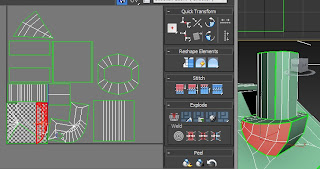 |
| Figure 4. Set by set selection |
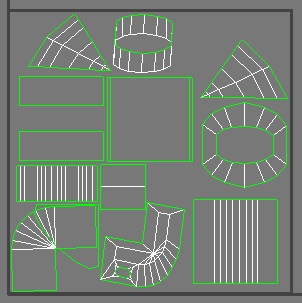
When I rendered my UVW templates, some of the objects are missing. Why? Have you notice something in Figure 4, my objects are outside the box with checkered background. This is when I realised that I made a mistake already. To overcome this problem, I selected all the objects and scale them down to fit in the box with checkered background (Figure 5). After fixing the size and position, my template is ready (Figure 6) for rendering.
 |
| Figure 5. Scale down to fit in the box with checked background |
 |
| Figure 6. Ready for render |
I used Adobe Photoshop to add colours to the objects as shown in Figure 7.
 |
| Figure 7. Adding colours in Adobe Photoshop |
Unfortunately, when I added the image to 3D max, it wasn't that good because the lines are visible. So next time, I should also include the lines in designing the polygons.
 |
| Figure 8. Final output |


